ORIGINAL ART : Crazy Castle!

"Crazy Castle"
wood blocks, laser-cut frame pieces, assemblage, acrylic and spray paint,
German foil scrap, and various mixed media
by Tommy Kovac
     We had all these extra little square wood shelves from some media shelving we keep CDs and DVDs on, and they've been sitting in the garage for years, because I kept thinking I could use them for some art project. So this is the project.
     I used all of the little square shelves, and then started sawing off pieces of other long shelves I got from my aunt, using my jig-saw to make the turret thingies.
     I had sooooo much fun with spray paint, acrylic paints, and these rad paint markers I ordered on Amazon! Not to mention weird little found pieces of shit I used to hang in the windows.
     Here are some detail pics:

It's one of those baubles from a chandelier, but now it's a NOSE!
Isn't that just the SILLIEST?!

Broken piece of wind chime I've been hoarding for about a decade.

Tiny baby with chandelier bauble head! CRAZINESS!
     And here are some pics of the various stages of construction, and my cluttered work areas:


This was really where most of the magic happened, right on the living room floor in front of the TV. I make messes like this all over the house, and leave stacks and piles of paint tubes, colored pencils, spray paint cans, shavings of stuff, etc. Then Anthony has to come along and vacuum when I'm done because I'm allergic.

ORIGINAL ART : The Ballad of Tubert

"Tubert"
extra-thick cardboard packing tube, paint markers, duct tape, ric-rac,
adhesive gem thingies, pipe cleaners, feather, cake decorating hat, and craft foam
by Tommy Kovac
     Why Tubert? Why not, I say.
     When we unpacked a big box with an unassembled exercise machine, there was this random super-thick cardboard tube in it that seemed to serve no purpose. It wasn't keeping anything in place, it had nothing inside of it, it was just kind of... there.
     But now it is Tubert, and has purpose, meaning, and personality.
     Here he is in the nude:
The nude form is nothing to be ashamed of.

ANTHONY'S BIRTHDAY (stuff I made for it)

     This is a way belated post, because Anthony's birthday is August 22nd. I sort of forgot I had started this post. Now it's Halloween, and we're waiting to see if we get (m)any trick-or-treaters, so I'm just sittin' here killing time.
     Here's the peanut butter and chocolate cake I made:

Recipe below, at end of post...

     Below is one of the presents I wrapped to make it look like a happy little birthday fellow. I feel this is something Martha Stewart might do if she had a sense of humor, or was human.
     (But don't get me wrong, I love Martha just the way she is. Stern, exacting, made of steel...)


     Here's another whimsical birthday fellow I made. Notice he even has weak little arms and legs made of glittery tinsel! He can't really walk with them. But he makes the best of his short existence. He will soon be torn apart.


My special secret for Anthony's cake was to substitute PEANUT BUTTER CHIPS for the regular ol' chocolate chips. Because Anthony is a peanut butter fiend, and that cake is loaded with chocolate enough already.
     Incidentally, the recipe card you see above is from a cookbook put together by a bunch of parents as some sort of fund-raiser I think, way back when I was in 6th grade at Cambridge Elementary in Orange, CA. (I'm 42 now, so that was, like, a LONG time ago.) We've kept that recipe in our family ever since because it's goooood, you guys!

ORIGINAL ART : Halloween 2013


     These three thingies are made of plywood and acrylic paint, including glitter paint and silver paint, and even some pearlescent paint on the moon. Anthony and I got a jigsaw so we could cut around the general shapes. The jigsaw is REALLY FUN. Plus we had to get sawhorses, and I tried to lay across them but Anthony stopped me.


     I did the drawings, and Anthony helped a LOT with the painting on the Jack-O-Lantern and the Memento Mori Bat. Plus he did a bunch of the sawing and the sanding. We're very handy.


     The Jack-O-Lantern is hanging on the porch post, and the bat will go on the garage, just below the big light that comes on at night. Not sure where we're putting Umbrella Girl, yet.


     This last line drawing is just a quick thing I did at work, because they asked me to do a Halloween drawing to put on the treat bags we're doing for the student helpers.
     In mostly unrelated news, I dressed up as a zebra for a costume party on Saturday. It was a pathetic attempt at a costume, and when I got home I accidentally peed on my tail.

CRAFT TIME : DIY Wallet

     I've made Duct Tape wallets before, and my last one finally got so grimy my husband insisted I replace it. So I tried something slightly different, using the same basic construction. I took some of my library comic strip art and reformatted it to be the right size and dimensions. After printing in color on photo paper, I laminated it with Contact Paper. Using a combo of clear packing tape and some Duct Tape, I made the wallet you see below.
     There are tutorials/patterns all over the internet. Here are a few:

(Ignore my fat Slovak fingers)
Open, with the exterior showing
The interior
     I used some old discarded library checkout cards to make interior pockets. One of them is from a book called NOBODY ELSE HAS TO KNOW by Ingrid Tomey, and the other is from TROUBLE ON THE TRACKS by Donna Jo Napoli.

The inside and interior are lined with plaid Duct Tape
The library checkout cards form pockets to stash stuff behind, plus there's a clear plastic pocket OVER them, so you can slip something like your Drivers License (or public library card) into it!
Do it!

     Next time, I plan to make one using the actual cover of a discarded paperback novel. The exterior would look like this:


     I like how cheesy that cover is. Of course I'd remove the remains of that barcode label.

MOTHER'S DAY 2013


     Just thought I'd share the little illo I did on my mom's Mother's Day card envelope. That's my mom pulling the wagon. My mom is the very best mom ever. :)
     I needed little boxes for her gifts, and I got crafty. So I'm sharing that, too.

I actually made the box on the left out of vellum card stock. The one on the right is "re-purposed."

Spray paint and doilies!

The bottoms of the boxes turned out really cool, I think.

NOTE TO SELF: There is no way for a guy to use or even mention "doilies" without seeming like a total nancy. I'm okay with that, but it seems like there should be some manlier alternative term for them. 

     Tomorrow morning my husband and I are taking our two wonderful mothers out to breakfast together, all four of us. That's our tradition. We are very lucky to have these two special ladies in our lives.
     Then after breakfast he takes his mom to the movies, and my mom and I go where the wind takes us. Maybe we'll do a craft, maybe we'll go shopping, maybe we'll play a game. We cannot be pinned down.

ARTS & CRAFTS


     This is just some in-progress stuff on my art table right now. I liked the juxtaposition of things. I love the fun mess of the process, when you've got all this stuff out and you're still trying to figure out which things to use, which elements to edit out, but for the time being it looks crazy and exciting.

     I'm doing illustrations for a friend's book, plus I'm getting ready to do some artwork for a group show in May (gallery999), so naturally I had to get sidetracked and do some weird stuff that has nothing to do with either of those things.
     First I gave a makeover to a scuffed-up brown outdoor bunny using glitter paint and spray paint:
He is now an indoor bunny.

The pattern on his back allows him to hide, entirely camouflaged, in my art room.

     And then I drew this doodle:

BOX OF BOOKS VOL.5 RELEASE PARTY

     Saturday night my husband and I drove up to Chinatown in L.A. with our good friend Matt for the "release party" of a group art project I participated in. "Box of Books Vol.5" was organized by Darin Klein & Friends. (Darin's a curator at L.A.'s Hammer Museum)
     20 creators were each asked to make 100 copies of a little reversible booklet using 11"x17" paper and a clever cutting and folding technique. Subject matter was totally up to the creators.
The Weirdling Woods (I sign each one by hand in magical silver ink)
     I chose to use this opportunity to work with a project I've been noodling with for years. An illustrated children's fantasy story called The Weirdling Woods.
The Weirdling Woods, page 3
     That's all you get, as far as a peek at The Weirdling Woods. I'll be selling them online for $5 each through my Etsy shop: HERE. (Give me until about 11/7/'12 to get it listed, por favor)

Sales table, people, a dog...

More people, and that freeloader dog is still there... (I don't think it even purchased Box of Books Vol.5)

Upstairs zine room, looking down on main floor of exhibit hall

Anthony amid art

The foyer of the facility was draped with black ribbons, a visual theme that was carried throughout the place.

ART : Old Handmade Stickers

     When we first began the long and spread-out process of packing in preparation for moving, I came across some old DIY stickers I'd made for one of my first comics conventions. I printed them at home on sticker paper and cut them out by hand. I remember it was VERY difficult to peel the paper backing off, and I kept apologizing to anyone who bought them. This was in the very early 2000s, and home printable stuff has improved a LOT since then.
I still like the odd shape of this one. And I don't know what kind of animal or thing I intended that to be.

This one is like a weird Skelebunnies tribute to Edward Gorey.

CRAFT TIME : tablet tote out of discarded library book

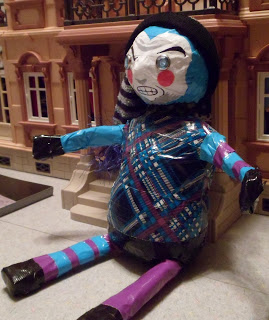
          I bought a "budget tablet" recently, because I sure as hell can't afford an actual iPad. My tablet is a Lenovo Ideapad A1, and was on sale for $199 at Best Buy. Just sayin'. PC World rated it the best of the budget tablets.
          I was going to fork over some more cash for a cover/case/whatever, but then I decided to get resourceful and creative instead.
          When I told my husband I was going to MAKE a tablet protector case out of a discarded library book, he was like, "Mm-hm. Sure you will." (In his defense, I say LOTS of things. Yesterday I was sitting on the couch watching TV, and said, "In an alternate reality I'm on the treadmill right now.")
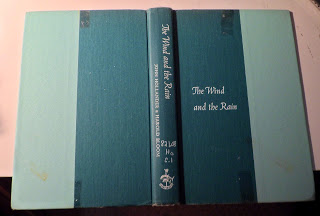
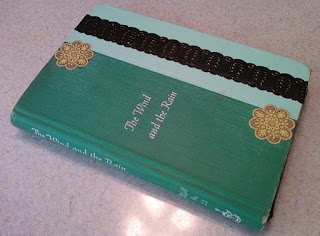
"The Wind and the Rain," a book of poetry
          Having worked in numerous libraries, I have collected a stash of discarded paperbacks and hardbacks. Some because I like the books themselves, and some because I was sure one day they would provide craft material.
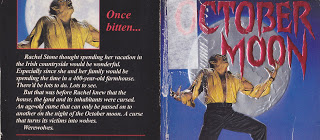
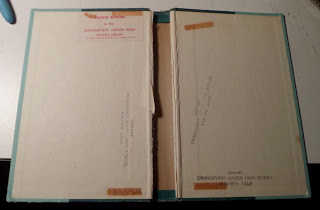
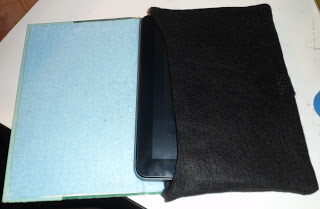
          First I chose a hardback of pleasing color and title that was just slightly bigger than my tablet.
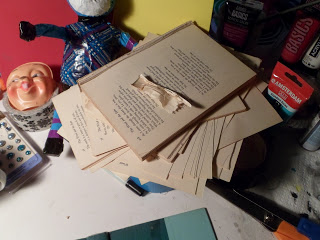
          Then I boldly tore out the pages. It was an uncharacteristic act of savagery. I liked it.
          I kept the eviscerated insides because I'm a pack rat, and maybe I can use them for some OTHER craft.
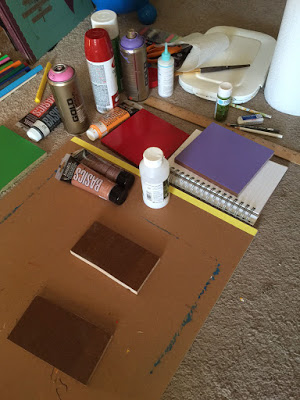
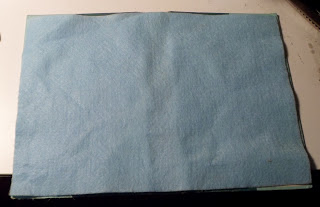
          Next I chose a pale blue felt rectangle with which to line the inside of the book cover. I used regular Elmer's glue for that, but have since discovered that actual "fabric glue" works a lot better when you're working with felt.
          I glued two rectangles of black felt together, back-to-back, to give an extra layer of cushioning, and then folded them in half and sewed the two sides up, to create a pocket. Get it? I turned it inside-out, so the stitching is hidden on the inside. This is the extent of my sewing skills, and even that much is really pushing it.
          I glued the black felt pocket to the blue felt lining with Elmer's glue. It didn't really work and made a mess, and I was like, "Shit! It's RUINED! Everything is RUINED!" But I took a deep breath and went to Michael's, where I found cheap FABRIC GLUE. It worked like a charm, and the crisis was averted.
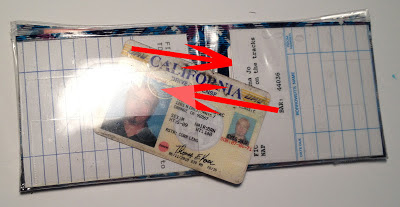
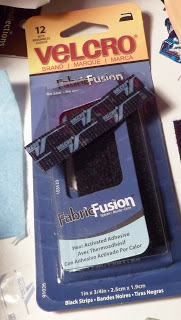
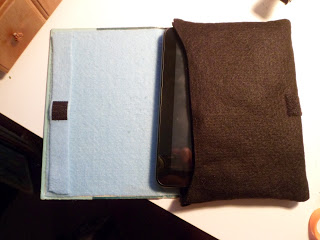
          I made Velcro fasteners using squares of iron-on adhesive Velcro, shown above. If I had KNOWN I'd be using iron-on stuff, I would have done that BEFORE gluing the blue felt liner into the inside of the book cover. Which is why I had to cut a new strip of blue felt, iron the Velcro square onto that, and then glue it onto the existing blue felt liner.
          (Luckily I had figured out the iron-on Velcro BEFORE I sewed up the black pocket, otherwise that would have been a lot trickier, too.)
          But wait- we're not done! On the outside of the book cover there were some icky yellowish stains from old book tape that had been used to hold the dust jacket (which I got rid of, it was ugly) in place. I tried gently cleaning the stains with Windex, but it didn't work.
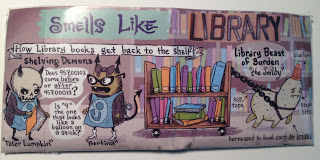
          That's where ephemera and adhesive decorations come in handy. Back to Michael's.
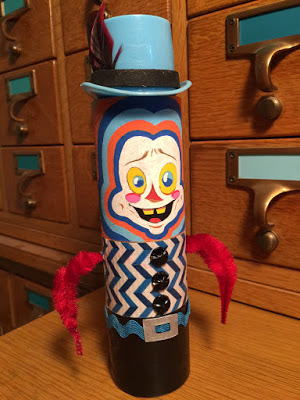
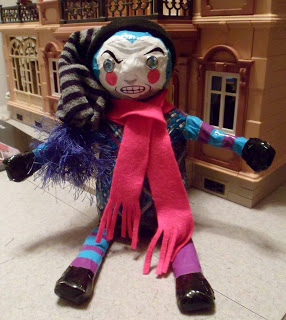
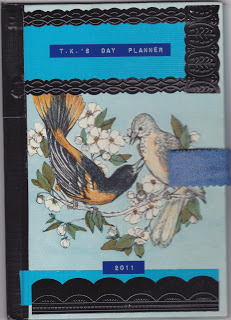
The front, tastefully decorated
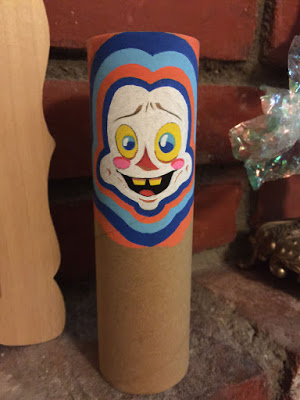
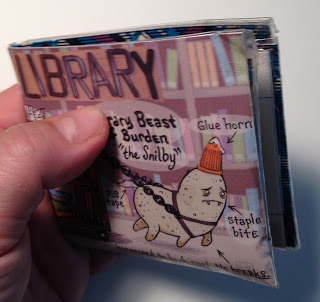
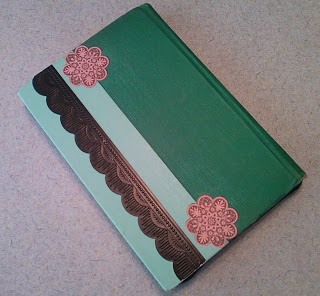
The back, tastefully decorated
          Okay, NOW we're done.
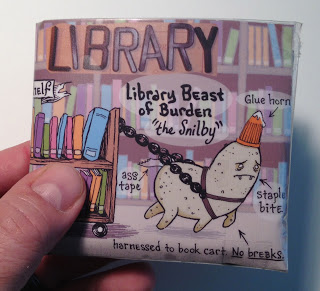
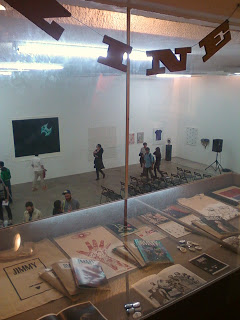
          And look! It's a secret. Nobody will even know there's a TABLET in there...

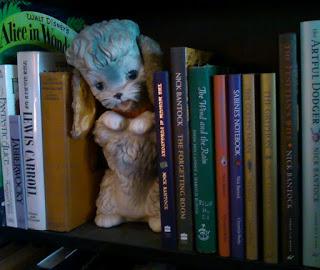
There it is! Third book from the puppy! Shhh...

TAPERT : duct tape homunculus

          One day driving to work I suddenly thought, "I wonder if you could make a doll out of duct tape? I made my wallet out of it. How much harder could a doll be?"
          So I grabbed my trusty Sharpie (always in the truck with me) and scrawled "Duct tape doll" on the back of my hand, so I wouldn't forget.
          Tapert is the result.
          To begin with I took the snipped off end of a striped stocking and filled it with these stuffing bead things I've had for years. They're made for stuffing dolls/plush animals with. I like them. Makes his bum weighty enough for proper sitting. But it was tricky taping the stocking closed with duct tape. Not pretty. 
          Then I used some pliant wire (recycled from a cleverly-wrapped Christmas gift someone gave us) to form the skeleton for his limbs and his head.
          For his head I started ripping out pages from a discarded dictionary. My original idea was one page of each letter, so he'd be smart. But I started from Z, and only made it through O, before realizing I couldn't fit any more pages in, or his head would be huge and unwieldy.
          Luckily, the page I happened to tear out of the O section included "okapi," which is my favorite wild animal. There was even a drawing of one. So although Tapert may not know about anything that starts with letters A-N, at least he knows about okapis.
          I wadded the dictionary pages into a nice round ball, and stuck on 3 tiny pom-pons to create a nose bump. Then I wound up his head in the blue duct tape, around the wire loop.
          To give his arms and legs a little thickness, I cut long rectangles of foam and taped over those. Now I'm thinking they're too blocky, but it's too late for that, and I don't want Tapert to feel insecure so I don't say anything disparaging in his presence.
          Hands and feet were problematic. I was determined to use only duct tape for his body, so he ended up with black... caps? Well, actually they sort of look like hooves, or trotters. He is not nimble with them.
          Thanks to plaid patterned duct tape he is wearing a plaid shirt.
          His face is painted white, with jeweled brads for eyes and some hand-drawn details. I knew he was gritting his teeth and furrowing his brow before I drew it, I just had to follow my instincts.
          He needed a hat, so I used another striped stocking. I rolled the cut end up to form a bit of a cuff, and sewed the other end up with a bunch of strands of furry blue string/yarn, so the cap has a puffball.
          I thought maybe I was done, but then Tapert was like, "Bitch, I'm still COLD! Make me a SCARF."
          I was a little surprised at his choice of hot pink, but I think it suits his look. It's bold and fashion-forward. He doesn't give a shit what people think.

DAY PLANNER 2011

It's crafty!
          A few years ago our tax lady convinced me to keep a day planner with all my appointments, trips, etc.  Now I find it indispensible, and write every deadline or obligation in that one place, rather than scattered between 2 wall calendars at home, and 2 at work.
          The first couple day planners I purchased on the cheap, but then I realized it's pretty stupid simple and I could totally just make my own for even CHEAPER.  So I did.
          I found a 99 cent children's book on birds at the used book store and tore out the interior pages and decorated it all DIY gay, as you can see above.  I even used felt and Velcro for a fastener, and Martha Stewart brand wedding invitation embelishments spray-painted black.  WTF, right?  I was in a frenzy, so I even busted out the pinking shears, duct tape, and Dymo label gun.
          For the interior calendar pages I just used Word and created tables with the right amount of cells and filled in the date info.  I printed and stapled it half-size zine style, which fit inside the book perfectly, and glued the end pages to the inside book covers.
          It's a little ugly.